


Price: $12.99 - $10.39
(as of Apr 07, 2025 22:00:51 UTC - Details)
The Best Way to Apply Press-On Nails: A Comprehensive Guide
Introduction
If you’re looking for a quick and easy way to achieve beautiful nails without the hassle of a salon visit, press-on nails might just be your new best friend. In this guide, we’ll explore the best way to apply press-on nails, sharing tips and tricks that will transform your DIY manicure game. Whether you’re a beginner or a seasoned pro, understanding the nuances of press-on nails can save you time and make your nails look stunning. So, let’s dive into the world of press-on nails and discover how to achieve that perfect look!
Understanding Press-On Nails
What Are Press-On Nails?
Press-on nails are pre-designed nail tips that you can easily apply at home. They come in various shapes, sizes, and designs, making them a versatile choice for anyone looking to elevate their nail game. Unlike traditional false nails, press-ons are designed for convenience and are often less damaging to your natural nails.
Benefits of Using Press-On Nails
Using press-on nails has several advantages. They are quick to apply, often taking just a few minutes. Additionally, they allow for creative expression with countless designs available. Plus, they’re a cost-effective alternative to salon visits, saving you both time and money.
Preparing Your Nails for Application
Nail Care Before Applying Press-On Nails
Before you apply your press-on nails, it’s essential to prepare your natural nails. Start by removing any old nail polish. Then, gently file your nails to create a smooth surface. Pushing back your cuticles and washing your hands will also ensure a clean base for your press-on nails.
Choosing the Right Size
One of the most important steps is selecting the right size press-on nails for your fingers. Most kits come with multiple sizes. Take the time to try each one against your nail to find the perfect fit. A properly sized nail will adhere better and look more natural.
The Application Process
How to Apply Press-On Nails
Now that your nails are prepared, it's time to apply the press-on nails. Start with a clean, dry nail. Apply a thin layer of nail glue to the back of the press-on nail and to your natural nail. Align the press-on carefully and press down firmly for about 10-15 seconds. Repeat this process for each nail, ensuring they’re all secure.
Tips for a Long-Lasting Application
To ensure your press-on nails last as long as possible, avoid soaking your hands in water for the first few hours after application. This can weaken the adhesive bond. Additionally, consider applying a top coat over the press-ons for added shine and durability.
Maintaining Your Press-On Nails
Caring for Your Press-On Nails
Once your press-on nails are on, you’ll want to keep them looking great. Avoid using your nails as tools, as this can cause them to lift or break. Keep your hands moisturized, but try to avoid oil-based products that can weaken the adhesive.
How to Remove Press-On Nails Safely
When it’s time to remove your press-on nails, do so gently. Soak your nails in warm, soapy water for about 10-15 minutes. This will help loosen the adhesive. You can then gently wiggle the nails off, starting from the sides. If you encounter resistance, soak a bit longer. Avoid forcefully pulling them off to prevent damage to your natural nails.
Troubleshooting Common Issues
What If My Press-On Nails Keep Falling Off?
If you find that your press-on nails are not staying on, there may be a few reasons. First, ensure that your natural nails are clean and free from oils before application. If your nails are too short or not filed properly, the press-ons may not adhere well. You might also want to try a different brand of glue or press-ons, as quality can vary.
Dealing with Nail Lifting
If your press-on nails start to lift, it’s often due to moisture or improper application. Make sure to follow the application steps closely, and avoid water exposure for at least a few hours after applying. If lifting occurs, you can apply more glue under the lifted area to re-secure it.
Exploring Different Styles of Press-On Nails
Creative Designs and Trends
One of the best things about press-on nails is the variety of designs available. From classic French tips to bold patterns and glitter, you can easily switch styles to match your mood or occasion. Check online retailers for the latest trends and designs that catch your eye.
Customizing Your Press-On Nails
If you want to add a personal touch to your press-on nails, consider customizing them. You can paint over them, add nail art stickers, or even use rhinestones for a touch of glam. Just make sure to seal any designs with a top coat to keep them looking fresh.
Conclusion
Press-on nails are an amazing way to achieve a salon-quality manicure at home. By following the best way to apply press-on nails, you can enjoy beautiful hands without the expense or time commitment of salon visits. Remember to prepare your nails properly, choose the right size, and care for them well to ensure they last. With a little practice, you’ll be a press-on nail pro in no time! Whether you’re going for a simple look or something more extravagant, press-on nails offer the flexibility and ease that anyone can appreciate. So, grab your favorite set and get started on your next nail adventure!
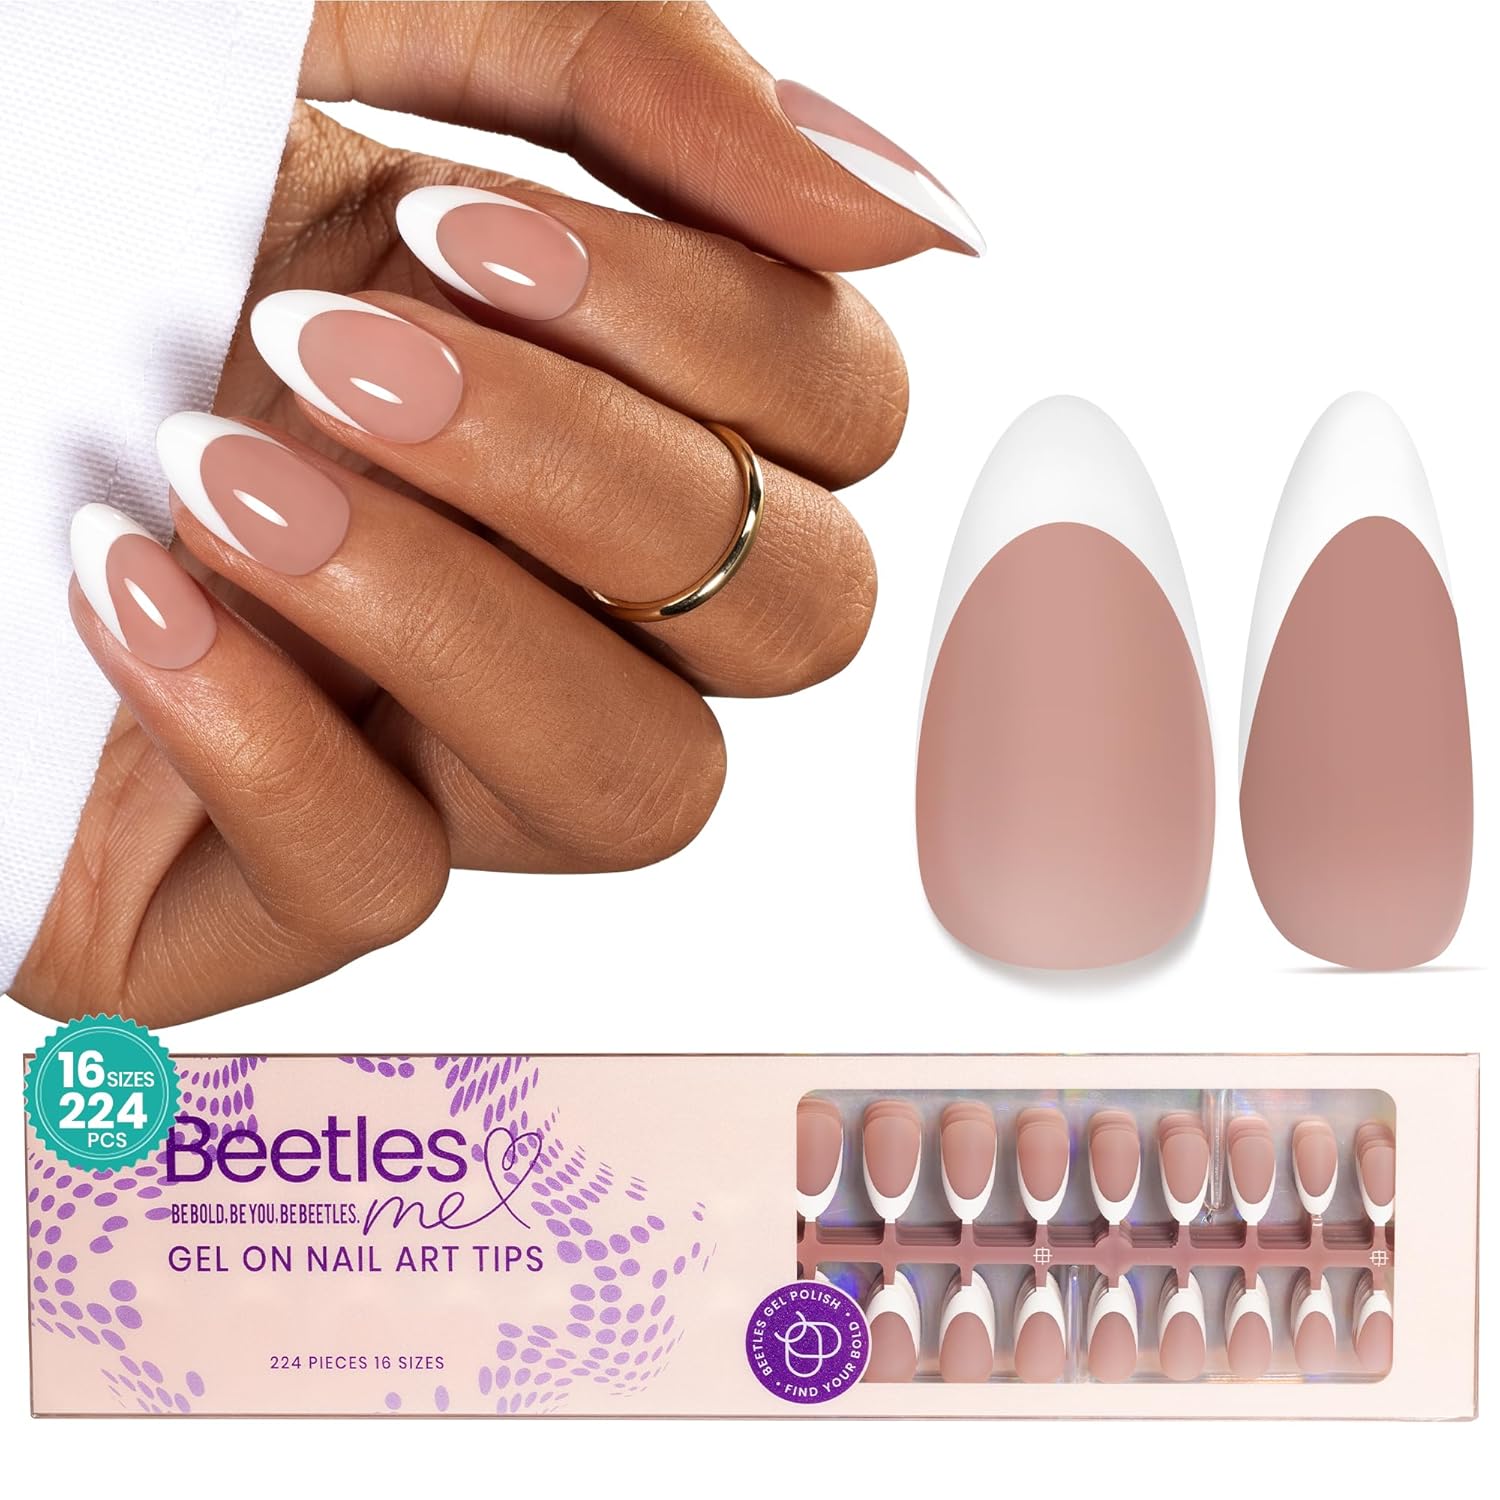
4-In-1 Design: The almond brown press on nails with Pre-Prime, Pre-Base, Pre-Colored and Pre-File, which makes the nail tips surface a coarser matte and more effectively remove the nail grease in advance, so that the nails have stronger adhesion with glue and are not easy to fall off.
No Shaping Needed: The beetle gel nail tips are pre-shaped and do not need to be shaped. The nails have strong adhesion, are durable and long-lasting, and the pattern is not easy to wear and fall off. Lasts longer.(Warm reminder: It needs to be used with nail glue. This product does not include nail glue and needs to be purchased separately)
Multi-Size Selection: Contains 16 different sizes of nail pieces, 224 pieces in total. The fake nail tips provide you with more choices. You can quickly fit the size and widely adapt to different sizes of finger requirements.Suitable Gifts for professional manicurists and even nail beginners.
Time-Saving Use: French tip press-on nails come freely designed for your nail art, with no base coat required, and no drying time. Even beginners can create salon-like nail extensions within 20 mins! You can stick them on your nails with glue, then apply one layer of builder gel and one layer of top coat, and you're done (Not including builder gel and top coat!)
Best Gift: This is a suitable gift for nail art beginners or manicurists, enjoy DIY nail art fun with your friends and family! (Please contact us directly if you have any problems while using. We always keep active to help you solve problems.)