


Price: $7.99 - $6.99
(as of Apr 07, 2025 08:01:46 UTC - Details)
The Best Way to Apply Press On Nails: Your Ultimate Guide
Introduction
Are you tired of spending hours at the salon for a manicure? Press on nails are a fantastic solution that combines convenience and style. They are easy to apply, cost-effective, and come in a variety of designs. In this article, we will explore the best way to apply press on nails, ensuring you get a flawless look every time. Whether you're a newbie or a seasoned pro, this guide will provide practical tips and tricks to make your press on nail application a breeze.
What Are Press On Nails?
Press on nails are pre-designed artificial nails that can be easily applied at home. They come with adhesive backing or require additional nail glue for a secure fit. The beauty of press on nails is their versatility. You can find them in a range of shapes, colors, and styles, making them perfect for any occasion. Plus, they can be removed without damaging your natural nails, making them a safe and stylish option.
Choosing the Right Press On Nails
Consider Your Nail Size
Before applying press on nails, it’s essential to choose the right size. Most brands offer a variety of sizes to fit different nail beds. To find your perfect fit, measure your natural nails and compare them to the sizing chart provided by the manufacturer. This step is crucial because improperly sized nails can lift or pop off easily.
Explore Different Styles
When selecting press on nails, think about the styles that suit your personality and the occasions you’ll be attending. From simple nude to intricate designs with glitter and gems, the options are endless. Consider buying a few different styles to match various outfits and events.
Preparing Your Natural Nails
Clean and Shape Your Nails
Proper preparation is key to achieving a long-lasting press on nail application. Start by removing any existing polish and wash your hands thoroughly. Next, gently push back your cuticles and file your nails to the desired shape. This will create a smooth surface for the press on nails to adhere to.
Buff the Nail Surface
Lightly buffing the surface of your natural nails can help the adhesive bond better. Use a fine-grit buffer to avoid damaging your nails. Just a few gentle strokes will do the trick, creating a slightly rough texture that enhances adhesion.
Applying the Press On Nails
Use the Right Adhesive
Depending on the type of press on nails you choose, you may need nail glue or they might come with adhesive strips. If using glue, apply a small amount to both the press on nail and your natural nail. Be careful not to overdo it; too much glue can create a mess.
Align and Press Down Firmly
Once you have your adhesive ready, align the press on nail with your natural nail, ensuring it covers the entire nail bed. Press down firmly for about 10-15 seconds to ensure a strong hold. You can also use a wooden stick or your fingers to apply even pressure.
Tips for a Flawless Finish
Avoid Water for the First Few Hours
After applying your press on nails, it’s best to avoid water for at least a few hours. This allows the adhesive to set properly. If you need to wash your hands, do so gently and avoid soaking them.
Add a Top Coat
For an extra layer of protection and shine, consider applying a clear top coat over your press on nails. This not only enhances the look but also helps to seal the edges, preventing lifting or chipping.
Maintaining Your Press On Nails
Avoid Excessive Force
While press on nails are durable, they are not indestructible. Avoid using your nails as tools to open packages or scratch surfaces. Treat them gently to prolong their life.
Remove With Care
When it’s time to remove your press on nails, do so carefully. Soak your nails in warm, soapy water for a few minutes to loosen the adhesive. Gently wiggle the nails off; if they resist, apply more water and wait a little longer.
Troubleshooting Common Issues
What If They Don’t Stick?
If your press on nails are not adhering properly, it may be due to excess oil on your nails or not enough adhesive. Make sure your nails are clean and dry before application. If needed, use a dehydrator to remove oils.
How to Fix Lifting Nails
If you notice any lifting after application, you can often fix it quickly. Use a small amount of nail glue to reattach the lifted corner. Press down firmly and hold until secure.
Conclusion
Applying press on nails doesn't have to be complicated. By following these steps, you can achieve a salon-quality manicure at home. Remember to choose the right size and style, prepare your natural nails, and apply them carefully for the best results. With the right techniques and a little practice, you'll be able to enjoy beautiful nails that make you feel confident and stylish. So, next time you're in need of a quick beauty fix, remember the best way to apply press on nails for a flawless finish!
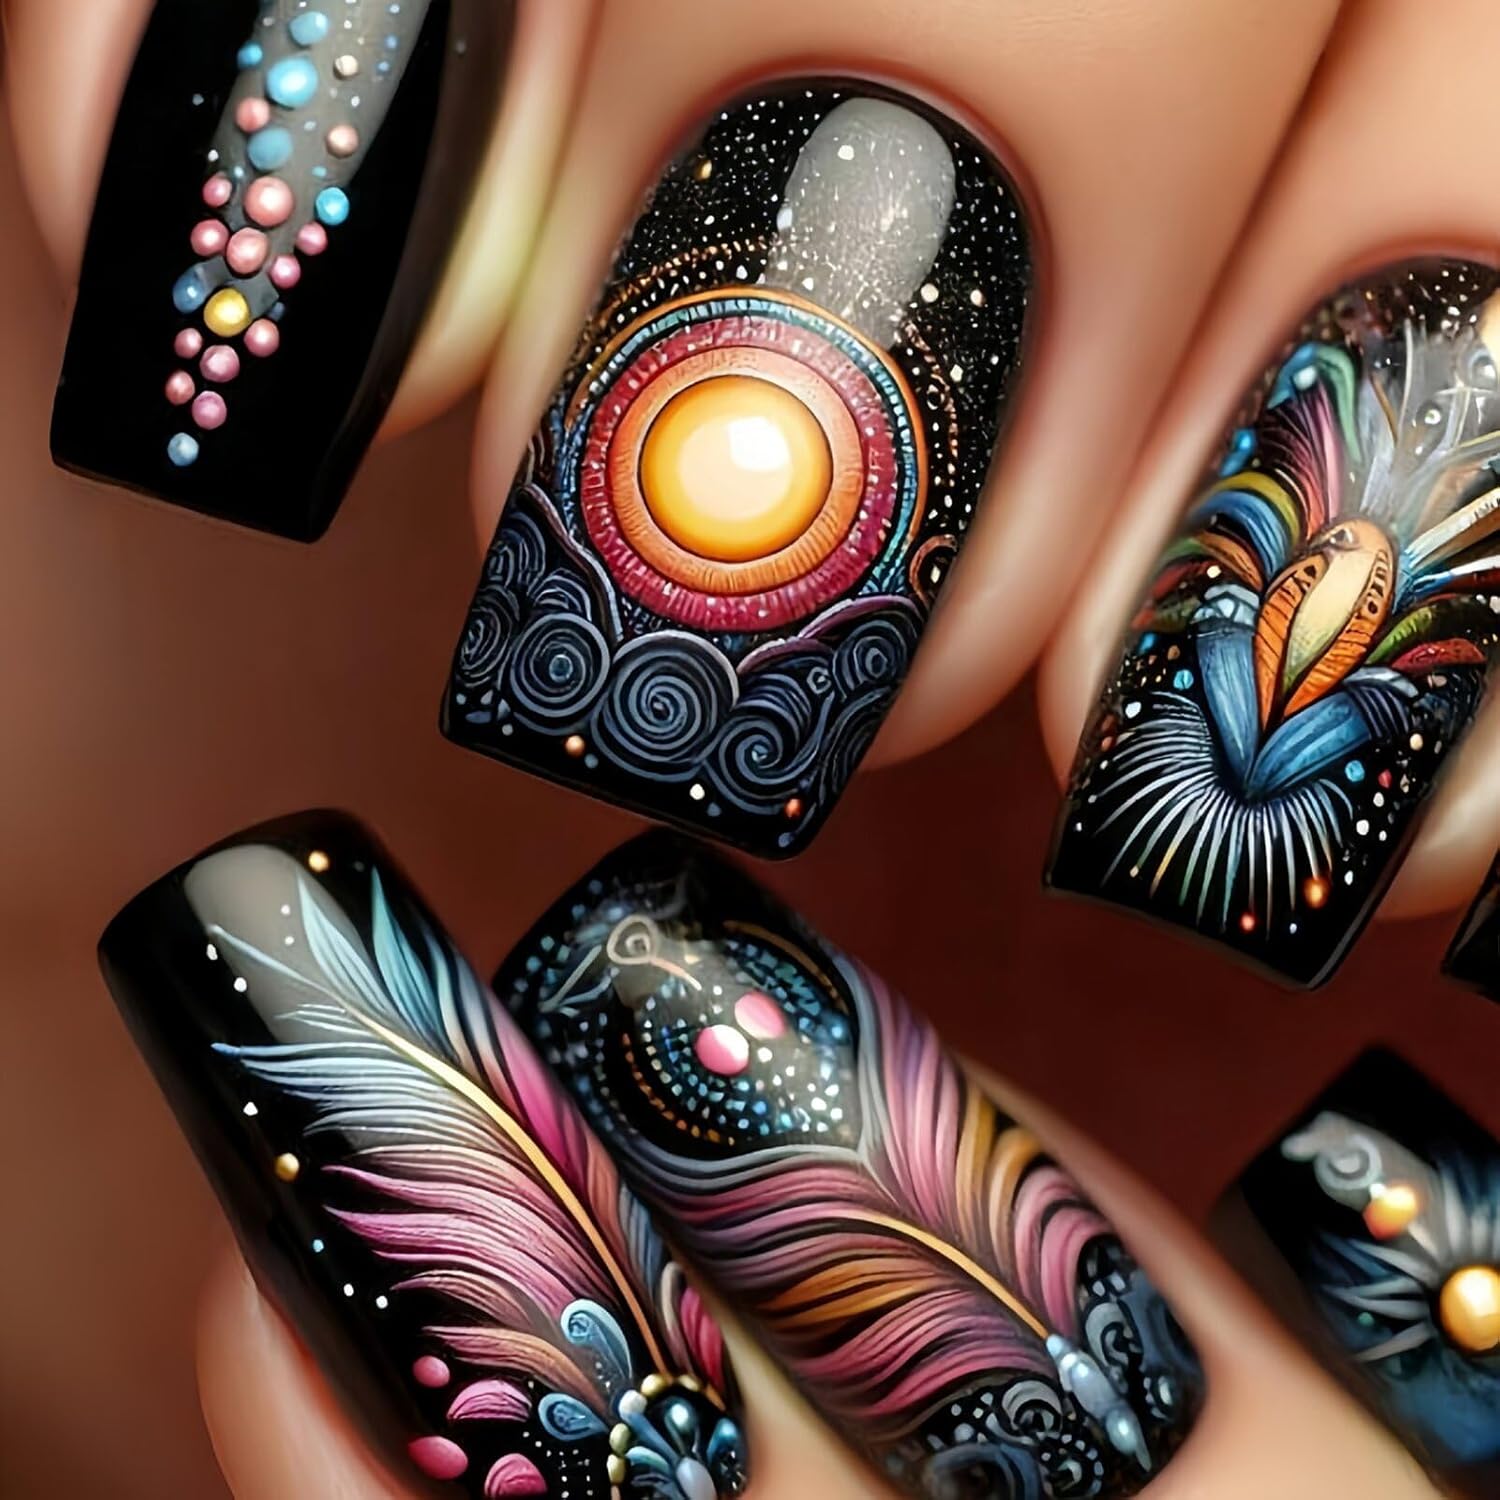
Colorful Artistic Designs: These nails showcase captivating elements — vivid abstract patterns, bold colors, geometric forms, and whimsical brushstrokes. They instantly infuse your look with a vibrant, artistic allure.
High - Quality: Crafted from premium materials, these nails withstand daily wear. Highly resistant to chipping and breaking, they let you confidently flaunt your stunning colorful - artistic - themed nails on various occasions.
Easy to Apply: You don't need to be a professional nail artist to wear these nails. They are easy to apply and remove, allowing you to quickly transform your look for art galleries, color - themed parties or any colorful art - related events.
Comfortable Fit: These nails comfortably fit fingers. Wear them all day during colorful art events like art exhibitions or creative workshops. With zero discomfort, you can go about daily activities effortlessly.
Affordable: You don't have to break the bank to look amazing while indulging in colorful art - related activities. Our colorful artistic press - on nails are an affordable way to add a touch of artistic flair and vivid charm to your look.